A quiet hiss with the volume turned up is normal in many vinyl systems. A loud hum or buzz that follows you across every record is not.
The mistake is to change the cartridge, buy a new cable, move the speakers, and blame the pressing all at once. You may get lucky. You will not know what fixed it, and you could make the setup worse.
Turntable hum is easier to trace when you treat the system as a chain. Start by working out whether the noise is electrical or mechanical. Then change one connection at a time.
First, describe the noise
Before touching a cable, turn the volume down. Remove the record and secure the tonearm. Bring the volume back to your normal listening level, not an exaggerated maximum.
Now listen for the pattern:
- a low, steady hum often points to grounding or a ground loop
- a sharper buzz may come from a loose connection, cable shielding, or nearby electronics
- noise in one channel points more strongly to one signal cable, cartridge lead, or channel in the phono path
- noise that changes when you touch the tonearm or a metal connector suggests a grounding problem
- noise that starts only when the platter spins may be mechanical vibration or motor noise
These are clues, not verdicts. A badly connected cable can produce more than one kind of noise.
Run the platter-off test
Pro-Ject’s turntable hum guide starts with a useful split: is the hum audible when the amplifier is on, the turntable input is selected, and the platter is not spinning?
If the answer is yes, investigate the electrical path first. That includes the ground wire, phono stage, signal cables, power arrangement, and nearby devices.
If the system is quiet until the platter starts, look for a mechanical source:
- remove the record and mat, then test again
- check that the turntable is level and stable
- make sure the dust cover, furniture, and cables are not vibrating against the plinth
- move the turntable farther from speakers and subwoofers
- check the manufacturer’s instructions for motor, belt, platter, and transport-screw setup
A mechanical hum can still reach the speakers through the cartridge. The stylus and cartridge are vibration sensors, so they can pick up energy from the shelf and turntable as well as the groove.
Check the phono path before the ground wire
A turntable signal needs a phono preamp. That preamp may be inside the turntable, inside an amplifier or powered speaker, or in a separate box.
Trace the connection from the turntable to the speakers and identify which device is doing that job. Then check the switches and inputs.
Common mistakes include:
- a turntable set to
PHONOconnected to a normal line input without an external phono stage - a turntable set to
LINEconnected to an amplifier’s phono input - an external phono stage connected to another phono input instead of a line input
- the wrong moving-magnet or moving-coil setting on an adjustable phono stage
- too much gain selected for the cartridge
Audio-Technica’s connection guide makes the basic distinction clear: a turntable’s line-level output can feed a normal powered-speaker or amplifier input, while a phono-level output needs a phono preamp.
Do not stack two phono stages. The result is usually much too loud and distorted. Do not compensate for a quiet, incorrectly connected phono signal by turning the amplifier far beyond your usual listening level either. That raises the noise along with the music.
Check the ground wire
Switch off the turntable, phono stage, amplifier, and powered speakers before changing connections.
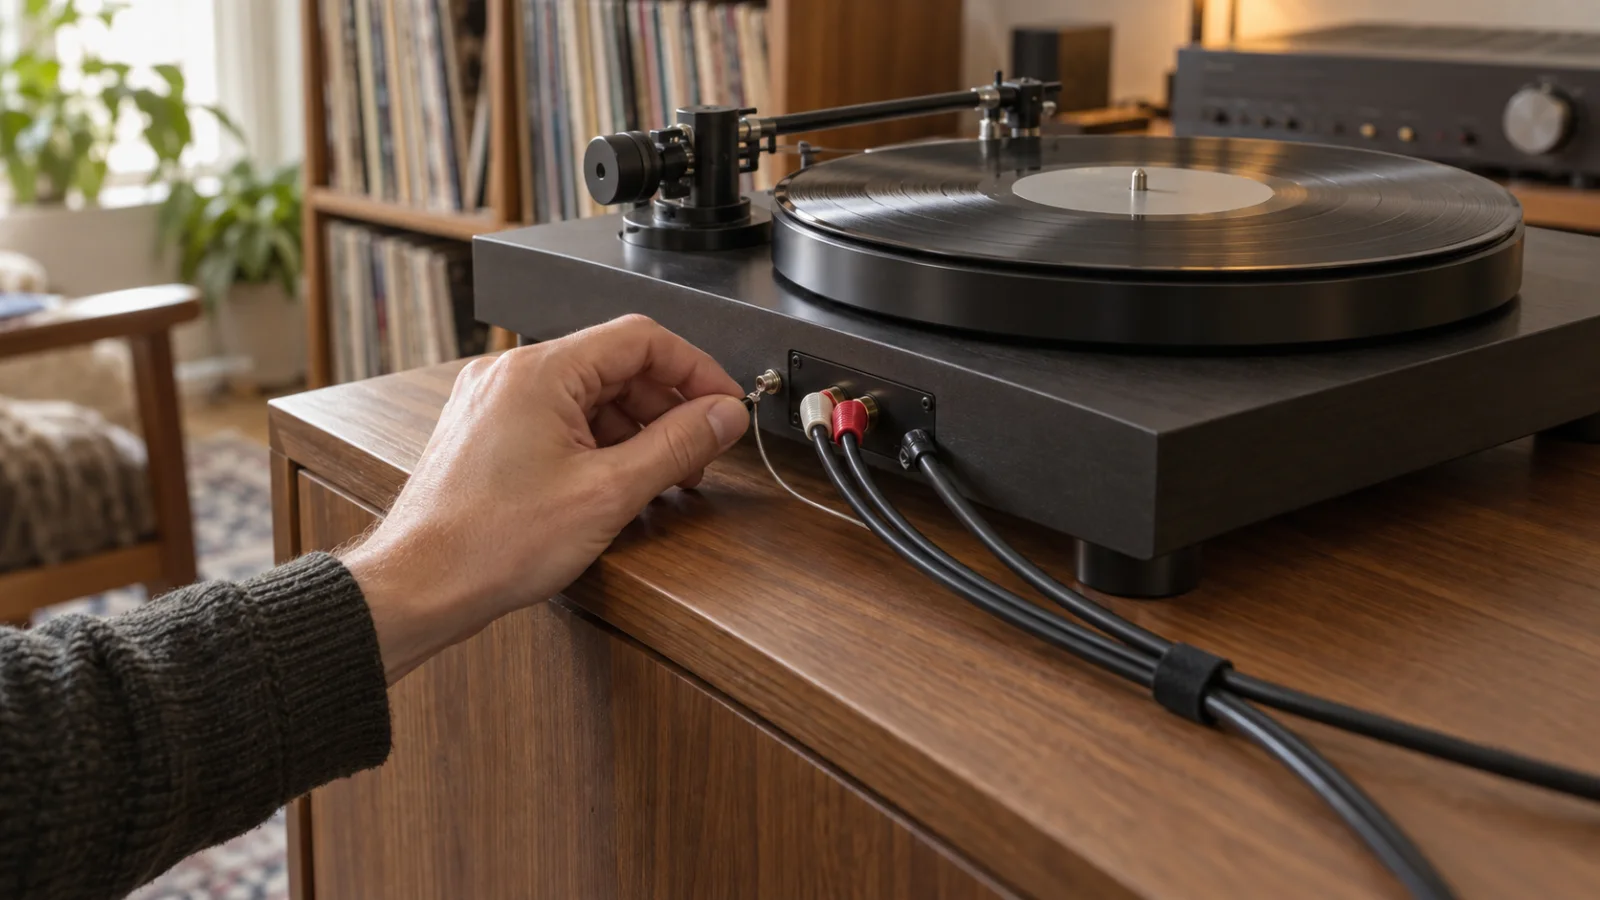
If the turntable has a separate ground wire, connect it to the ground terminal on the phono stage or amplifier that receives the turntable’s phono signal. Tighten the terminal enough to hold the wire securely.
Then inspect the basics:
- Is the wire attached at both ends?
- Is bare metal making contact, rather than insulation?
- Is the terminal loose or oxidised?
- Did the hum begin after moving or reconnecting the system?
Some turntables ground through their signal cable or internal wiring and do not have a separate ground lead. Follow the manual for your model. Do not add a random wire to a case screw and assume it is a proper signal ground.
Pro-Ject also notes that a few systems hum less with the separate ground lead disconnected. That is a valid test only for the turntable’s low-voltage signal-ground wire. Never remove the protective earth from a mains plug, use a cheater plug, or open mains-powered equipment to chase a hum.
Simplify the power arrangement
More than one route to ground can create a loop. A turntable, external phono stage, amplifier, powered speakers, television, and computer can all become part of the same problem.
Temporarily simplify the system:
- Disconnect sources you are not testing.
- Remove USB connections to computers and televisions.
- Plug the audio components into one properly made power strip, if their manuals allow it.
- Do not daisy-chain power strips.
- Reconnect one device at a time until the hum returns.
If the noise comes back when one device is reconnected, you have found the branch to investigate. The answer may be a different input, better cable routing, an isolator designed for that connection, or advice from the equipment maker.
Do not defeat electrical safety grounds. If the system only becomes quiet when a protective earth is removed, stop and ask a qualified technician or the manufacturer for help.
Move signal cables away from interference
The signal between a cartridge and phono preamp is small, so cable placement matters more here than it does for many line-level sources.
Separate the turntable’s signal cable from:
- mains leads and extension cables
- power adapters and charging bricks
- Wi-Fi routers and mesh points
- televisions, computers, streaming boxes, and games consoles
- dimmer switches and some LED lighting supplies
- large transformers inside amplifiers and powered speakers
Do not coil excess phono cable beside a power adapter. Keep signal and mains cables apart. If they must cross, Pro-Ject recommends crossing them close to a right angle instead of running them parallel.
For a quick interference test, switch nearby devices off one at a time. Moving a router or power brick costs nothing and can settle the question before you buy another cable.
Test the cables without buying anything
With every component powered down, reseat the left and right RCA plugs. Check for a loose fit, a bent connector, a damaged cable, or a lead stretched tightly behind the cabinet.
If the turntable has removable signal cables, swap in a short, known-good shielded pair. Keep the original ground arrangement and change only the cable. If the noise disappears, repeat the test once before declaring victory.
If the cable is fixed to the turntable, do not tug or twist it. A hum that changes as a fixed cable moves can indicate a damaged conductor or shield that needs service.
You can also narrow down a one-channel buzz by swapping the left and right plugs at one point in the chain while the equipment is off. If the noise moves to the other speaker, the fault is upstream of that swap. If it stays on the same speaker, look downstream. Return the plugs to their correct channels after the test.
Check the cartridge connections last
Four small leads connect most removable cartridges to the headshell or tonearm wiring. A loose or oxidised contact can cause hum, but these clips and cartridge pins are easy to damage.
Only inspect them after the external checks. Switch everything off, protect the stylus, and use the cartridge maker’s wiring diagram. Grip a clip by its connector, never by the thin wire. If the leads are tight, unfamiliar, or difficult to reach, leave them alone and use a dealer or technician.
Hum that began immediately after a cartridge change makes this area more suspicious. Hum that appeared after plugging in a television does not.
Use a one-change troubleshooting log
Write down each test and result. A short log stops you circling back to the same cable after half an hour.
Use this template:
- noise with platter stopped: yes or no
- one channel or both
- changes when the signal ground is connected: yes or no
- phono or line setting checked
- external phono stage settings checked
- USB and other sources disconnected
- nearby electronics switched off
- signal and power cables separated
- known-good cable tested
- result at normal listening volume
Use two or three clean, familiar records from your My Vinyl+ collection as listening checks once the system is quiet. Pick records you know well and note the cartridge or setup used if a playback problem follows one exact pressing. Equipment hum should appear without caring which album is on the platter.
When to stop troubleshooting
Stop and arrange service when:
- the hum began after a liquid spill, impact, or electrical fault
- a plug, adapter, or component becomes hot
- you smell burning or see damaged insulation
- the turntable hums with a minimal, correctly connected setup and known-good cables
- touching a mains-powered case produces a tingle or shock
- the repair would require opening mains-powered equipment
Turn the system off and unplug it if there is any sign of an electrical safety problem.
The bottom line
Start with the platter stopped. If the noise remains, trace the electrical path. Confirm that one phono stage is in use, check the turntable’s signal ground, simplify the power connections, separate signal cables from power and wireless equipment, then test one cable at a time.
If the noise only starts when the platter spins, investigate vibration, placement, the motor, and the turntable’s mechanical setup.
Change one thing, listen at a normal volume, and write down the result. Most hum problems become much less mysterious once you find the exact connection that brings the noise back.
Sources: Pro-Ject Audio Systems: Turntable Electrical Hum Guide, Henley Audio: Turntable Earthing Advice, Audio-Technica: How to Connect Your Turntable to Speakers, Klipsch: How Do I Troubleshoot and Fix the Hum in My Hi-Fi System That Has a Turntable?.